|
We are now in full swing with testing so I thought I would take a couple of minutes to discuss testing using Chromebooks and iPads. First when testing with a Chromebook CMS has enabled most tests to use kiosk mode. Kiosk mode keeps a student locked in to a test and prevents mis-administration. It also cuts way down on user error ;-) Currently we use kiosk mode on the Chromebook for both ACCESS testing and MAP testing. To get to a kiosk mode test click on "apps" on the bottom left corner of the Chromebook screen. You do this BEFORE logging on to the Chromebook. Students do not log on to the actual Chromebook during kiosk mode testing. You then look for the test you are doing and click on it. Super easy!! MAP testing on the iPad is now easier. Look for the MAP test icon and you can now MAP test through the actual app instead of using the online bookmark. This should be an easier way to access MAP tests. Look for the icon below to access the MAP test app. When a student finishes you should be able to log on and off the same way you do in the web version. If you are having an issue, double click the round "home button" which will open up rectangle with all of the open apps. Swipe up on the MAP testing app to completely close the app (this will also log the student off so only do this when you are finished testing). When you open the app again you should be good to go. In my next blog I will talk about using guided access to lock a student into an app and block them from accessing part of an app that you do not want them to access. This is a good way to make sure they stay in the MAP testing app on the iPad. I did a presentation on IPads which included this feature. I need to update it for the current iOS but the basics are the same. You can click here to see that presentation. Guided access is presented on the 2nd page. Email me if you have questions! 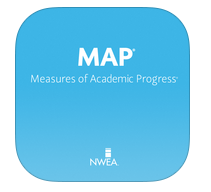
0 Comments
Leave a Reply. |
Jennifer MooreI am a teacher who has a passion for technology. Archives
September 2016
Categories |
 RSS Feed
